
Table of Contents
Searching for the best camera for wildlife photography? It’s a tricky task with lots of variables, but luckily we’re here to help. Our in-depth guide below is based on countless hours of testing out in the field, which means we can help answer all of the big questions. For example, do you need a full-frame camera for wildlife photography? Is crop-sensor best? And how many frames per second do you need? Read on for all of the answers.
We’ve reviewed every new interchangeable lens camera on the market, but only a handful are really outstanding when it comes to wildlife photography. We’ve taken everything into consideration, from the number of autofocus points and battery life to professional concerns such as dual memory card slots and wireless image transmission.
And there’s more – if this is going to be your first leap into interchangeable lens photography, or you’re looking to go big on your next lens purchase, we’ve taken the liberty of suggesting a few lenses that will do justice to your careful research and fieldcraft.
From ultra-zoomy bridge cameras to pro-grade DSLRs, we’ve looked at everything in our ranked list of the best cameras for wildlife photography in 2022. So whether you’re looking to take your first steps in the genre, or have been well and truly bitten and are looking to upgrade your current rig, there’s something here for you.
How to choose the best wildlife camera for you
Along with sports, wildlife photography is the genre that places the greatest technical demand on a camera. Wildlife subjects are often small, reluctant photo subjects, which means autofocus accuracy, and speed, are absolutely critical. You can all-but guarantee that subjects will appear in surprising locations, so a camera that can quickly detect a subject and drive the lens’ autofocus to the right distance is critically important.
You’ll also want a camera that offers good continuous shooting performance. This isn’t something you’ll need absolutely all the time, but for birds in flight, animals jumping, or other pouncing, feeding and hunting behavior, being able to rattle off a dozen frames a second – and in some cases even more – is incredibly useful. Yes, timing is everything, but sometimes keeping the shutter button held down and hoping for the best can yield equally spectacular results.
There’s more. If you’re going to shoot wildlife in regions like northern Europe, weather-sealing is vitally important, as you won’t want to let a spot of rain deter you from getting out. Things to look out for include weather-sealed buttons and switchgear, as well as sealing at the junction between lens and camera body. For those embarking on more far-flung adventures, dust-sealing will also save you a few bucks in repair bills. As ever, the best kind of camera protection is insurance.
There are a few other things to consider. If you’re heading off on a once-in-a-lifetime trip, you might consider a camera with two memory card slots. This offers a bit of peace of mind – if a camera is writing every image to two memory cards at once, it doesn’t matter if one fails mid-shoot. Social media doyennes might also think about a camera with integrated Wi-Fi, which can allow you to send images to your phone, and then on to the wider web, without to hook things up to a memory card reader or a laptop.
Best wildlife photography camera in 2022:
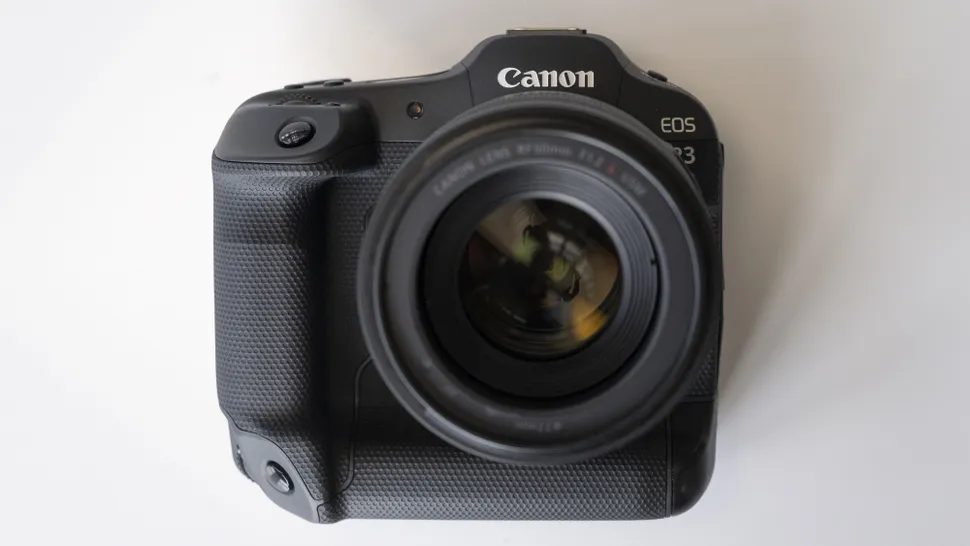
What happens when you throw caution to the wind and make the most bonkers, money-no-object mirrorless camera seen yet? Canon knows, and the EOS R3 is the result.
Its strengths for wildlife photography are myriad; the EOS R3’s headline continuous frame rate of 30fps (in electronic shutter, rather than mechanical shutter, mode) severely restricts your ability to make excuses for missed shots, while its gnat-like reactions when it comes to autofocus honestly need to be seen to be believed. Car, animal, and person priority autofocus means the days of choosing a particular autofocus point and trying to get your subject under it could be numbered.
We’ve tested the EOS R3, as well as its smaller stablemates, the EOS R5 and EOS R6, in a number of challenging autofocus situations, and the capabilities of Canon’s top-end crop of mirrorless cameras needs to be seen to be believed. It’s not just about stills performance; the EOS R3 is an absolute prizefighter when it comes to video as well. It can shoot ultra-crisp video up to 6K RAW; or 4K in 4:2:2 10-bit, giving video editors loads of latitude in post for color grading. For wildlife film-makers slow motion is an option as well; up to 120fps in Ultra HD.
Want more? It’s built like a tank, is weather- and dust-sealed, has both SD and CFExpress slots, all the custom modes you could ever want, and compatibility with Canon’s fast-becoming-legendary RF-mount lenses, which, while pricey, are currently the last word in interchangeable lens image quality.
Perfect partner: Canon RF 800mm F5.6L IS USM
Pushing the boat out? You asked for it. If you’re headed out with the EOS R3, pair it with an equally compromise-free lens, like Canon’s RF 800mm F5.6L IS USM. All the lens a wildlife photographer could want, it combines incredible reach with a large maximum aperture to help keep shutter speeds fast.

Want to shoot better wildlife photos? Not overly concerned with the latest and greatest video modes? The Sony A9 II could be for you. We won’t insult you (or Sony) by describing this pricey camera as ‘basic’, but there’s no mistaking its stills-first focus.
It’s all about performance. You get 10fps speeds using its mechanical shutter, rising to 20fps when you use the silent electronic shutter, coupled with impressive autofocus performance. This adds up to a camera that locks on tight to its subject and then hoses it down with a continuous burst of sharp, 24.2MP raw files. Autofocus is next-level: 693 phase-detection points, including animal and human-priority AF, and an almost uncanny degree of precision, means you’ll be able to make the most of even the most fleeting of wildlife encounters.
Shoot video? It does that, although not with the panache of some other cameras at this price. You get 4K, of course, but at a relatively constrained selection of frame rates. Where others support overcranked, slow-motion footage, the A9 II will give you up to 100fps (PAL) at just Full HD, rather than 4K.
Image quality is spectacular. Like most of the cameras here, Sony has eschewed stratospheric megapixel counts, and that means the A9 II shoot gorgeous, clean images at surprisingly high ISOs thanks to the lower pixel density.
Perfect partner: Sony FE 200-600mm F/5.6-6.3 G OSS
Those buying into Sony’s interchangeable lens ecosystem have some brilliant quality options when it comes to lenses. If you’d rather go big than go home, look at the Sony 500mm f/4 G SSM. If you’d like to have a bit of dosh spare for tickets to far-flung places to make the most of your new gear, you might investigate the Sony FE 200-600mm F/5.6-6.3 G OSS, which is a little slower than the 500mm prime (f/6.3 at its furthest zoom), but a super sharp bit of gear that still includes optical image stabilization for a more reasonable price tag.
Sony FE 200-600mm F5.6-6.3 G OSS

Remember DSLRs? We’re kidding: there’s plenty of life left in them yet, but there’s no arguing that these old-school designs are beginning to head in the direction of the fossil-fuel car.
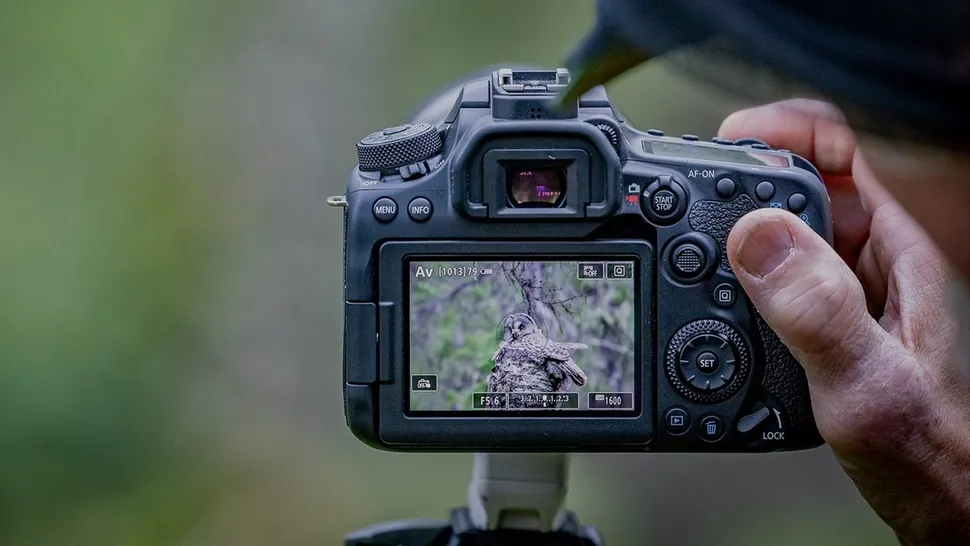
Still, until they’re buried for good, there are plenty of excellent models out there, offering wildlife photographers some really appealing oprions. Enter the Canon EOS 90D, a three year-old, crop-sensor DSLR from Canon with – gasp – a proper flappy mirror mechanism and an optical viewfinder. The latter in particular is no bad thing – at this price, digital viewfinder resolution often suffers, which obviously isn’t a problem here.
For wildlife types, there’s a lot to like. For one thing, it will shoot at 10fps, which is pretty impressive. And, while its 45 cross-type autofocus points doesn’t sound impressive compared to the multiple-thousands of its mirrorless brethren, autofocus on the 90D was still fast and accurate in our tests, even in poor light. And while that crop-frame sensor might lack the appeal of full-frame cameras, it applies a 1.6x multiplier to the focal length of any lens you attach, allowing you greater reach from shorter lenses.
Image quality is good – this is a relatively high-resolution camera, which means those 32.5 million pixels are pretty tightly jammed together on the small sensor, with a concomitant impact on image quality once you start pushing the ISO up . You’ll definitely be able to tell the difference between this and much more expensive full-frame mirrorless options, but it offers better value for non-pros.
Perfect partner: Canon EF 70-300mm f/4-5.6L IS USM
Canon has one of the most mature lens platforms around, and while the EOS 90D isn’t compatible with the latest and greatest RF-mount lenses, it will work with both EF and EF-S lenses. Our pick of the bunch would be the Canon EF 70-300mm f/4-5.6L IS USM; these days an ‘oldie but goodie’ given its announcement 11 years ago, but it’s still sharp, zoomy, quick to focus and light at a shade over 1kg.
Canon EF 70-300mm f/4-5.6L IS USM

Where are you prepared to compromise? If you’re happy to spend a great deal of money there’s no doubt that a full-frame, current-gen mirrorless camera will get you the best of all worlds – incredible image quality, blazing fast performance and amazing autofocus – but you’ll be parting with multiple thousands to add one to your bag.
Enter the Olympus OM-D E-M1X, surely a contender for worst product name in modern photography. But ignore that – there’s an incredible amount of power here on offer at a reasonable price. It can shoot up to 18 frames per second, offering continuous capture of up to 287 raw images or unlimited JPEGs. But it doesn’t stop there. If you’re prepared to sacrifice mid-burst autofocus and auto-exposure, you can make use of the E-M1X’s 60fps burst mode – that’s full resolution raw capture at a spectacular rate of knots. There’s also Pro Capture mode, in which a half-press of the shutter button begins buffering up to 35 images which are then saved to the card when you fully push the button. It makes anticipating action easier.
There are other pro features. Twin card slots reduces the impact of card failure, while IPX-1 environmental sealing means you can carry on in dusty, wet and cold environments. The full-height design means the lower portrait grip can accommodate two batteries. A final plus for wildlife snappers is that small sensor, which provides a 2x multiplication factor to every lens you attach; so a 300mm becomes a 600mm, and so on. All of this in a body weighing under a kilo.
Which brings us to the compromises. The reason the E-M1X has such a dramatic affect on focal length is that the sensor is tiny – half the size of that found in full-frame bodies, which means high ISO photography suffers. If you’re happy to forego some of the E-M1X’s more spectacular high frame rate features, you’ll finder larger-sensor cameras elsewhere – but if you’re confident you’ll be working at lower ISOs you’ll struggle to find this kind of performance without spending a fortune.
Perfect partner: Olympus 300mm f/4 IS Pro
You can’t accuse Olympus of going half-cocked when it comes to lenses. It makes a range of top-notch glass which will do justice to just about any subject. For wildlife types, the Olympus 300mm f/4 IS Pro is a spectacular bit of kit – that 300mm focal length is actually 600mm in practical terms, while integrated image stabilization helps get steadier shots. It’s pricey, but sharp and fabulously built, making it a great partner for the almost bomb-proof E-M1X.
Olympus M.Zuiko Digital ED 300mm 1:4.0 IS Pro

Let’s get the obvious out of the way: the RX10 IV is expensive, especially for a bridge camera. Before you skip this section in disgust, let’s take a look at the multiple reasons the RX10 IV deserves to be on this list. For one thing, that fixed lens has some really impressive specifications: 24-600mm, with an aperture range of f/2.4-f/4, makes this supremely flexible and pretty bright.
When you consider the weight and cost sacrifices you’d have to make to accommodate a 600mm f/4 on a Micro Four Thirds camera (much less an APS-C or full-frame model) the Sony’s all-in weight of just 1.1kg is really impressive, and deeply compelling for photographers who don’t want to burden themselves with multiple lenses.
As if that supersized lens wasn’t good news enough, there’s more for keen wildlife photographers. The RX10 IV’s maximum continuous speed is 24fps; it can shoot raw for better dynamic range; and its 315-point autofocus, while not quite the last word in autofocus point frame coverage, is pretty good. That performance comes courtesy of Sony’s BIONZ X image processor, which the keen-eyed will have spotted is also in the Alpha A9. Integrated image stabilization should help get sharp shots at 600mm.
It’s a tough customer – the frame is magnesium alloy, and it’s dust and moisture resistant, which should give you confidence to carry on shooting when the weather closes in. For a bridge camera, it’s big; for a DSLR with a 600mm lens it’s small. In this company, it definitely fits the bill as a convenient, lightweight, all-in-one camera, and benefits from a large, comfortable handgrip often forgotten by other smaller bridge cameras.
Image quality is pleasing rather than superlative, which isn’t surprising given the RX10 IV’s relatively small sensor, but if you can keep your shots under ISO 6400, and your print sizes under control, you’ll find the RX10 IV capable of some really excellent results.

Sony makes a deserved third appearance on this list, this time with the stonking A7 IV. It’s an incredible all-rounder: 33 megapixels gives it plenty of resolution, the BIONZ XR processor allows it to shoot at up to 10fps, and its 759-point autofocus makes itself exceptionally useful when it comes to reacting quickly – we found it amazingly accurate in our testing.
The 3,686-pixel EVF is an excellent example of its type, with a 120Hz refresh rate making it easy on the eyes and more capable than its predecessor at tracking moving subjects.
As an all-rounder, the A7 Mark IV ticks a lot of boxes, but it’s rare to find an all-rounder with no compromises, and so we should probably mention that that 10fps continuous speed won’t work with uncompressed raw files; only JPEGs and Sony’s compressed raws. Its 4K video mode is cropped – although you can shoot 10-bit, 4:2:2 S-log footage with an astronomical bitrate of 600Mbps, which goes some way to compensate.
Image quality, on the other hand, is excellent. You’ll get usable results at up to ISO 6400 and fairly decent shots even higher than that – truly impressive for a camera with such a high megapixel count.
If you’re going to shoot wildlife and nothing else, there are better cameras out there; Canon’s EOS R6 comes immediately to mind. But if you’re trying to hit the sweet spot between video performance, continuous shooting, resolution and image quality, the A7 IV could well be worth the compromise.
Perfect partner: Sony FE 100-400mm f/4.5-5.6 GM OSS
Looking for an all-round lens to go with your all-round camera? Allow us to recommend the FE 100-400mm G Master super-telephoto zoom lens, a 4x super-telephoto lens that weighs just 1.4kg, includes optical stabilization, and wide-open apertures of f/4.5 at the wide end and f/5.6 zoomed in. It lacks the steep learning curve (and price!) of a wildlife-focussed prime lens, making it a great bit of kit to learn on.
Sony FE 100-400mm f/4.5-5.6 GM OSS
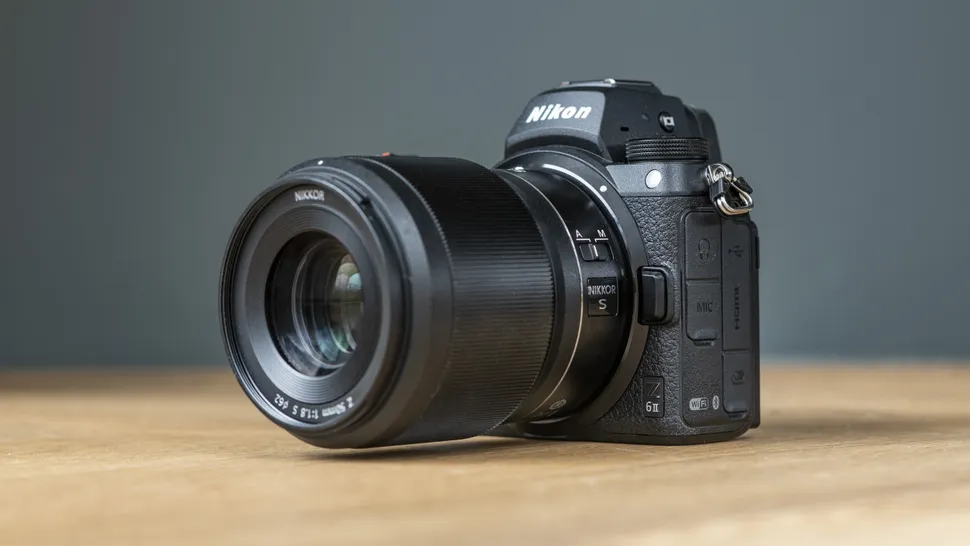
It’s rugged, it’s fast, it supports a vast range of excellent lenses – there a lot to like about Nikon’s follow-up foray into the world of mirrorless cameras.
The original Nikon Z6 was one of our favorite mirrorless DSLRs, and the Mark II solidifies its position. There are a lot of similarities between the two – this has a 24.5MP sensor, but Nikon has added a second image processor, giving the Z6 II a pair of Expeed 6 processors for increased bandwidth. That makes itself felt when it comes to shooting wildlife photography – its top continuous speed is 14fps. You also get amazing autofocus performance – 273-points including human and animal detection severely whittle down your excuses for missing a shot.
There are a few pro features included here as well – not least the addition of a second memory card slot, as well as a magnesium alloy body that’s sealed against dust and moisture. You’ll also appreciate the in-body image stabilization system (IBIS), which gave us the ability to shoot very long exposures hand-held. Useful for those swirling atmospheric wildlife shots.
Image quality is excellent – you get a little more resolution than you do with the Canon EOS R6, which is useful if you’re going to be cropping into your shots, or if you’re a fan of going big when it comes to printing.
Perfect partner: Nikon Z 100-400mm f/4.5-5.6 VR S
Nikon has pushed the boat out when it comes to the Z-series’ S-Line lenses, so let us recommend the Z 100-400mm f/4.5-5.6 VR S. It’s a stonking, if pricey, bit of kit that gives wildlife shooters of all levels of experience a superb blend of flexibility, reach and brightness, courtesy of that relatively large f/4.5-5.6 aperture range.
Nikon Z 100-400mm f/4.5-5.6 VR S

If you’re shopping for a Nikon DSLR for wildlife photography, you have a tough choice – this or the D7500. It’s practically an exercise in hair-splitting: they’re both crop-sensor DSLRs with the same resolution sensor; the D500 shoots 10fps; the D7500 8fps. The D500 has more autofocus points (153 to the D7500’s 51). They’re both weather-sealed.
Ultimately, for wildlife photographers, the D500 is the slightly better choice for the money. That two extra frames per second might not sound like much but will make itself felt when it comes to capturing truly action-packed sequences – ditto the extra autofocus points.
Want to feel even better about your decision? How about the fact that the D500 is a superbly built, weather-sealed bit of kit that brings to bear all of Nikon’s legendary prowess when it comes to building top-notch cameras for professionals? Its autofocus system is positively stellar, even if it lacks the next-gen bells and whistles of mirrorless cameras – we’re thinking about face and animal detection, in particular.
Image quality is excellent – terrific color science is married to an accurate metering system and very well controlled noise. We saw very good results up to ISO 12,800. Add to this the fact that the crop sensor gives you a 1.5x multiplication factor on any lens you attach – making all of your lenses significantly longer – and this is a great choice for wildlife photographers.
Perfect partner: Nikon AF-S NIKKOR 200-500mm f/5.6E ED VR
Have we got a treat in store for you. If you’re just starting out in wildlife photography, you can hardly do better when it comes to lenses than the AF-S NIKKOR 200-500mm f/5.6E ED VR. It’s a specialist lens – at 200mm at the wide end it’s not going to be much use for family gatherings or portraits, but with its 2.5x zoom ratio, constant f/5.6 aperture and integrated image stabilization (Nikon calls it Vibration Reduction, just to keep us on our toes), it’s a flexible little character. It’s also relatively affordable, very sharp, and comparatively light at 2.3kg.
Nikon AF-S Nikkor 500mm f/5.6E PF ED VR
What are the best settings for wildlife photography?
Figuring out how to set up a camera for wildlife photography takes a bit of experience and, dare we say it, a spot of trial and error, but we can get you started.
Starting from the top, we’d suggest shooting in raw if possible. A raw file is the data gathered by your camera’s sensor and nothing else – by contrast, a JPEG has a round of processing and compression applied to it. The result is that a JPEG file is easier to use straight from the camera, and will look better thanks to the processing, as well as being smaller.
But a raw file will have more dynamic range – that is, areas of bright highlights and dark shadow will have more data within them, allowing you to tweak your photo’s exposure with more latitude than it could withstand if it was already processed and compressed. The single biggest drawback is file size – expect a raw file to be several times larger than even the least-compressed JPEGs, so you’ll need a bigger memory card and hard disk to capture the same number of images.
Which metering mode is best for wildlife photography? The straightforward answer is, “whichever gets you the exposure you want”, but we’re happy to give you something a bit more technical. Metering describes how your camera measures the brightness of the scene in front of it. Different manufacturers use slightly different terms to describe different metering modes, but virtually all interchangeable lens cameras will offer average, centre-weighted, and spot metering.
Average metering allows the camera to look at the whole frame, average out the range of brightness across the whole scene, then shoot an exposure that sits halfway (roughly) between the brightest and darkest points. This is an exceptionally simple metering mode to use when you’re shooting a scene that is evenly lit. If you’ve got a subject against a particularly bright or dark background, though, you might find average metering to be inaccurate, which is where centre-weighted and spot metering come in.
They’re close bedfellows – spot metering reads the brightness from the very centre of the frame, and will use that as the average brightness of the whole scene. If you meter from a dark background and your subject is brighter, it will turn out over-exposed, and vice versa. The upshot? For tricky, small subjects – particularly ones against bright backgrounds (think snow, but also birds in flight against grey skies), spot metering, and a bit of experience, are the ways to go.
Don’t be discouraged if your first experience with centre-weighted and spot metering are disappointing – a few missed exposures are absolutely par for the course, and part of your valuable learning experience.

How we test wildlife photography cameras
Buying a camera for wildlife photography is a big investment, so every camera in this guide has been tested extensively by us. We focus on real-world tests, including shooting a variety of animals, alongside standardized tests for factors like ISO performance.
To start with, we look at the camera’s design, handling and controls to check it suitability for wildlife photography. When we take it out on a shoot, we’ll use it both handheld and on a tripod to get a sense of where its strengths lie, and test its startup speed.
When it comes to performance, we use a formatted card to shoot in both raw and JPEG. For burst shooting tests, we dial in our regular test settings (1/250 sec, ISO 200, continuous AF) and shoot a series of frames in front of a stopwatch to see if it lives up to its claimed speeds. We’ll also look at how quickly the buffers clears and repeat the test for both raw and JPEG files.
In various lighting conditions, we also test the camera’s different autofocus modes (including Animal Eye AF, if available) in single point, area and continuous modes. The tests we run are usually relative to the camera’s user level – for beginner models, we’ll take them to the local zoo, but for pro models with more advanced wildlife photography features we’ll take them for day out in a bird hide.
If the camera’s raw files are supported by Adobe Camera Raw, we’ll also process some test images to see how we can push areas like shadow recovery. And we’ll also test its ISO performance across the whole range to get a sense of the levels we’d be happy to push the camera to.
Battery life is tested in a real-world fashion, as we use the camera over the course of the day with the screen set to the default settings. Once the battery has reached zero, we’ll then count the number of shots to see how it compares to the camera’s CIPA rating. Finally, we test the camera’s video skills by shooting some test footage at different frame-rates and resolutions, along with its companion app.
We then take everything we’ve learned about the camera and factor in its price to get a sense of the value-for-money it offers, before reaching our final verdict on whether it deserves a place in our list of the best cameras for wildlife photography.
